Populating a Repeating Section from a Table
Description
You can use Alpha Anywhere's Data Binding features to automatically populate a repeating section with data from an external table.
About Populating Repeating Sections
Data from an external DBF or SQL table can be placed in a repeating section through Data Binding. Repeating Sections require slightly more complex data binding than, for example, a simple textbox control that is bound to a given field in a SQL table. Instead of being bound to a specific field, repeating sections are tied to a table that is itself linked to a parent table and uses a OneToMany 'Link type'. The repeating section can then be used to display data in a child table of the table that the repeating section is bound to.
Repeating sections are frequently used to create an invoice or detail form based on a larger table. For example, say you have a 'Orders' table that defines a list of orders from different customers. A second table might display the details of the customers' orders and a third table the details of the products that were ordered. A repeating section bound to the 'Order Detail' table could be used to display product information from the Product about all of the products that were ordered by a given customer.
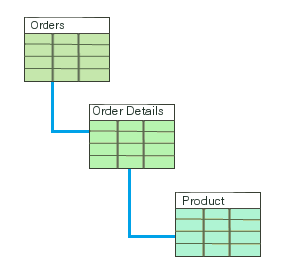
In order to link tables it is necessary to define a primary key. A primary key references the name of a field that is present in both tables. For example, the 'order' table and 'order detail' table might share a field named 'OrderID'. This field could then be defined as the primary key linking the two tables. You can use a different primary key to link the 'order detail' and 'product' tables, like 'ProductID'.

After the component has been bound to multiple tables, it is possible to bind the Repeating section to a table using the 'OnetoMany' Link type. In this example the Repeating section will be bound to the 'Order Details' table. The controls within the Repeating section can then be assigned to the fields in the Product table using a 'OnetoOne' Link type
In order to actually populate the Repeating section with data it will be necessary to create a populate action in the component's onDialogInitialize server-side event. When the UX component starts this event fires causing the action to run. The bound data is then transfered from the server-side table to the repeating section on the client-side.
For more on this subject watch this two part video: Part 1, Part 2, or follow the guides below.
Define a Repeating Section to Populate
In the UX Builder on the UX Controls page open the 'Data Controls' menu and then click on the [TextBox] option to add a textbox control to the UX component. Give the textbox the name and label 'product_id'
 Pressing the 'Make label same as name' button at the bottom of the 'New Control' dialog will speed things up. TIP: In the Field Properties section set this control's Width to '1in'.
Add a second [TextBox] control to the component with the name and label 'unit_price'.
TIP: In the Field Properties section set this control's Width to '1in'.Add a third [TextBox] control with the name and label 'product_name'.
TIP: In the Field Properties section set this control's Width to '3in'.Add a fourth [Textbox] control with the name and label 'units_in_stock'.
TIP: In the Field Properties section set this control's Width to '1in'.Finally, add a fifth [TextBox] control with the name and label 'quantity_per_unit'.
 TIP: In the Field Properties section set this control's Width to '1.5in'.
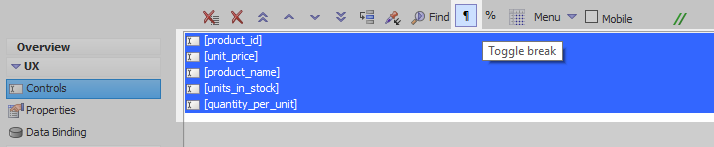
Highlight the five textbox controls and click the 'Toggle break' icon to turn off the toggle break between them.
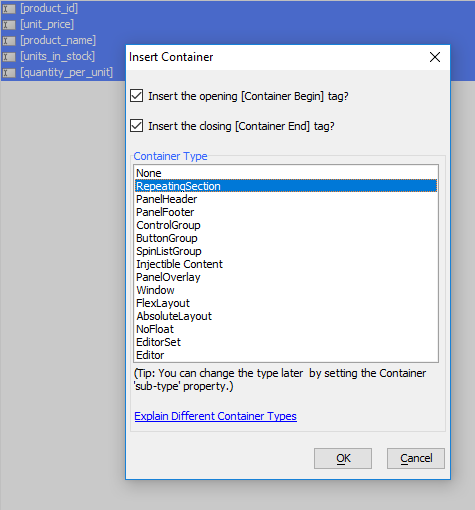
With the textboxes still highlighted, open the 'Containers' menu. Click on the [Container] option.

From the 'Container Type' list select the 'RepeatingSection' option.
The controls tree should look like this:
 Highlight the [RepeatingSection:REPEATINGSECTION_1] tab. In the properties list on the right set the 'Container width' property to 8 inches
Bind the Component to Data in Tables
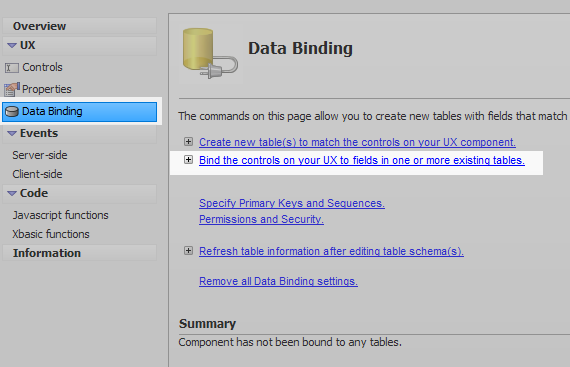
From the UX menu open the 'Data Binding' page and click on the Bind the controls on your UX to fields in one or more existing tables hyperlink.
Click the 'Specify Tables' button.

Click the 'Select' button at the bottom of the 'Select Table(s)' dialog.

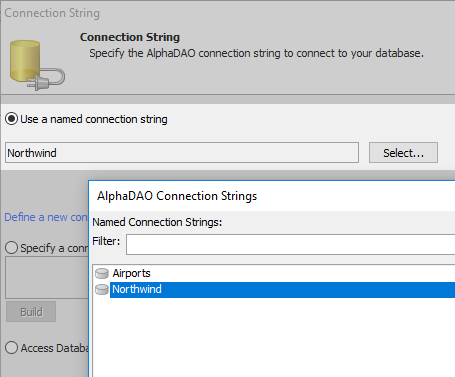
If you have a connection to the Northwind database check the 'Use a named connection string' radio button and then click 'Select...' and choose the Northwind connection. Otherwise check the 'Specify a connection string' option and build a connection. When you have a connection string Click OK.
Click the 'Add table' button and then 'Select Table'.
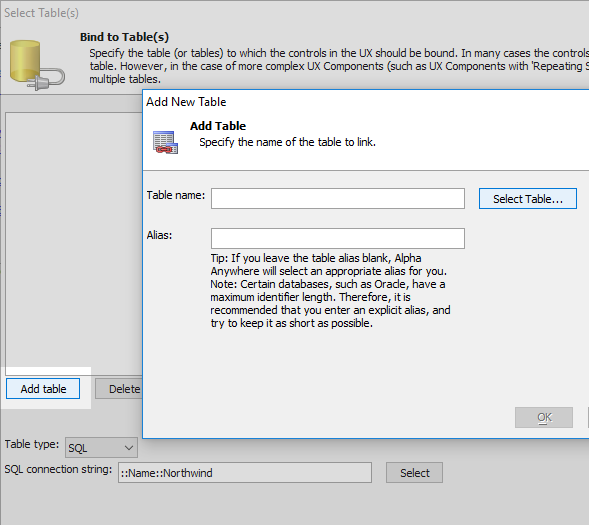
Choose the 'Orders' table and click OK and OK again.

Click the 'Add table' button a second time. Make sure the 'Link type' dropdown at the bottom of the 'Add New Table' dialog is set to 'OnetoMany', then push 'Select Table' button again.

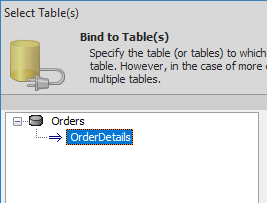
Select the 'Order Details' table from the Northwind database and click OK and OK again.

Click on the 'OrderDetails' table in the table tree.
In the Link Properties section of the 'Select Table(s)' dialog click the [...] button next to the 'Parent link fields' property and select OrderID.

The 'Link fields' property and the 'Primary key field(s)' property should be filled automatically.

Click the 'Add Table' button a third time. This time set the 'Link type' dropdown to be 'OneToOne'.

Click the 'Select Table...' button. Select the 'Products' table and then click OK and OK again.

Highlight the 'Products' table on the 'Select Table(s)' dialog's tables tree. Click the [...] button next to the 'Parent link fields' property.
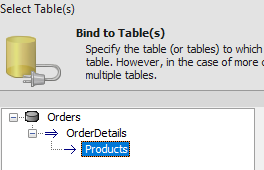
Select the 'ProductID' field and click OK

Click OK to exit the 'Select Table(s)' dialog.
Bind the Table to the Repeating Section
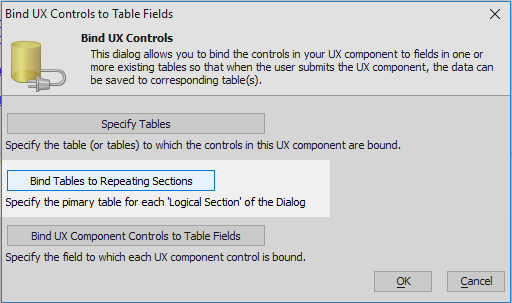
In the UX Builder open the Data Binding page. Click on the 'Bind the controls on your UX to fields in one or more existing tables' hyperlink.
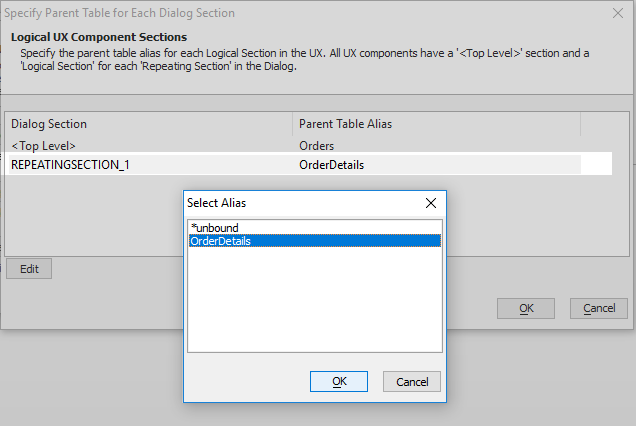
Click the 'Bind Tables to Repeating Sections' button.
Click on the 'REPEATINGSECTION_1' dialog section and select the 'OrderDetails' table. Click OK.
Assigning Variables to Fields
In the 'Bind UX Controls to Table Fields' dialog click the 'Bind UX Component Controls to Table Fields' button.

In the UX Section list at the top highlight the 'REPEATINGSECTION_1' option.

A variable list will appear. Click on the 'product_id' variable.

Assign the 'product_id' variable to the 'ProductID(N)' field and click OK
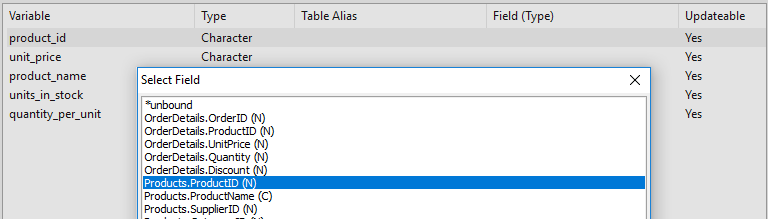
Click on the 'unit_price' variable and assign it to the UnitPrice(N) field.

Assign the 'product_name' variable to the 'ProductName(C)' field.

Assign the 'units_in_stock' variable to the UnitsInStock(N) field.

Finally assign the 'quantity_per_unit' variable to the 'QuantityPerUnit(C)' field. Click OK and OK again to exit.

Assigning an Action to Populate the Repeating Section
In the Events menu open the 'Server-side' events page. In the Server-side Events menu click on the onDialogInitialize event.

Place the mouse cursor inside the onDialogInitialize function by clicking anywhere inside the function definition.
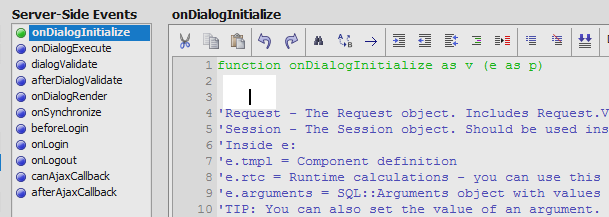
Click on the 'Action Scripting' icon in the top-right corner of the toolbar.

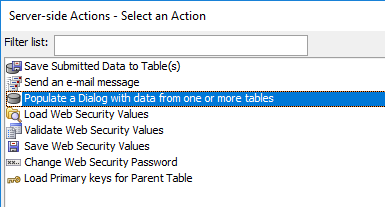
Click on and highlight the 'Populate a Dialog with data from one or more tables' action. Click OK.
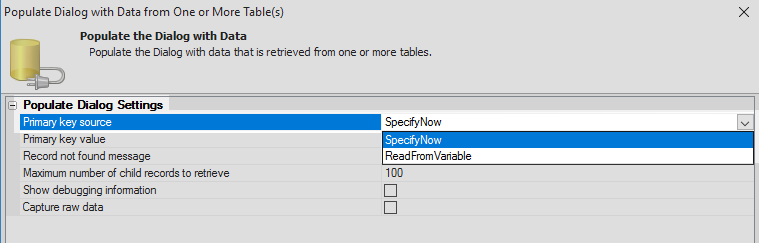
The 'Populate Dialog with Data from One or More Table(s)' dialog will appear. Click the dropdown next to the Primary key source setting, in the 'Populate Dialog Settings', and select 'SpecifyNow'.
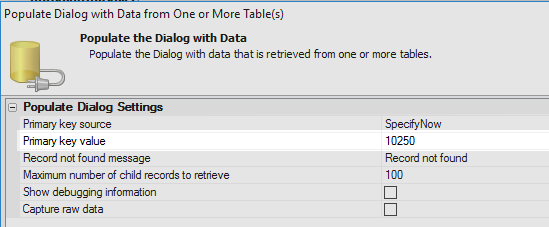
Set the 'Primary key value' to '10250'. This is a random entry from the list of Order IDs in the OrderID field. Click OK.
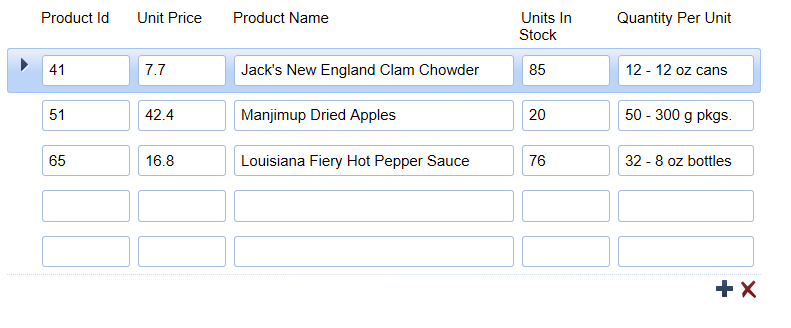
Run the component in Live Preview. All of the product information related to the 10250 order should be visible in the Repeating section.